Configuring and managing the Migration Toolkit for Applications user interface
Assessing and analyzing applications with the migration toolkit for applications user interface
Abstract
- 1. Introduction to the migration toolkit for applications user interface
- 2. Configuring the migration toolkit for applications instance environment
- 3. Configuring a migration toolkit for applications instance
- 4. Creating and configuring a Jira connection
- 5. Managing applications with MTA
- 6. Assessing applications with MTA
- 7. Tagging applications with MTA
- 8. Working with archetypes
- 9. Analyzing an application with analysis profiles
- 10. Analyzing applications with MTA
- 11. Managing MTA tasks by using Task Manager
- 12. Platform awareness in MTA user interface
- 12.1. Creating a source platform in MTA user interface
- 12.2. Discovering applications through source platform in the Administration view
- 12.3. Discovering applications through source platform in the Migration view
- 12.4. Associating an application with a source platform
- 12.5. Generating discovery manifests
- 13. Generating assets for application deployment in user interface
- A. How to contribute to the MTA project
Chapter 1. Introduction to the migration toolkit for applications user interface
You can manage your application migration projects by using the migration toolkit for applications (MTA) user interface (UI).
You can use the MTA UI to assess and analyze applications for risks and suitability for migration to hybrid cloud environments on Red Hat OpenShift. By using the UI, you can perform the following tasks:
- Assess the risks involved in containerizing an application for hybrid cloud environments on Red Hat OpenShift.
- Analyze the changes that you might need to apply to the code of an application to containerize this application.
Additional resources
Chapter 2. Configuring the migration toolkit for applications instance environment
To adjust migration projects to specific requirements, configure the migration toolkit for applications (MTA) instance environment.
You can configure the MTA instance environment by setting up the following parameters:
- General
- Credentials
- Repositories
- Proxy
- Custom migration targets
- Issue management
- Assessment questionnaires
2.1. Prerequisites
- You installed the MTA UI. For more information, see Installing the migration toolkit for applications user interface.
2.2. Configuring credentials
To provide the migration toolkit for applications (MTA) instance environment with secure access to your private source code and repositories, configure credentials in the user interface (UI).
You can set up the following credential types to configure the MTA instance environment:
- Source control
- Maven settings file
- Proxy
- Basic auth (Jira)
- Bearer token (Jira)
2.2.1. Configuring source control credentials
To provide the migration toolkit for applications (MTA) with secure access to private repositories when analyzing an application or creating a custom migration target, configure source control credentials.
Source control credentials include the username and password or Supply Chain Management (SCM) private key and a passphrase.
Procedure
- In Administration view, click Credentials.
- Click Create new.
Enter the following information:
- Name
- Description (Optional)
- In the Type list, select Source Control.
In the User credentials list, select Credential Type and enter the requested information:
Username/Password
- Username
- Password (hidden)
SCM Private Key/Passphrase
- SCM Private Key
- Private Key Passphrase (hidden)
NoteType-specific credential information such as keys and passphrases is either hidden or shown as [Encrypted].
- Optional: If you want to set source control credentials as default, enable the Use as the source control credential if an application does not have any assigned? switch.
Click Create.
NoteMTA validates the input and creates a new credential. SCM keys must be parsed and checked for validity. If the validation fails, the following error message is displayed:
“not a valid key/XML file”.
2.2.2. Configuring Maven credentials
To provide the migration toolkit for applications (MTA) with secure access to your private Maven repositories, configure authentication credentials in the user interface. Adding these credentials ensures analysis tasks can automatically retrieve the required data.
Procedure
- In Administration view, click Credentials.
- Click Create new.
Enter the following information:
- Name
- Description (Optional)
- In the Type list, select Maven Settings File.
-
Upload the
settings.xmlfile or paste its contents. Optional: If you want to set Maven credentials as default, enable the Use as the Maven credential if an application does not have any assigned? switch. These credentials will be used by default for all applications that do not have any assigned credentials.
ImportantIf you do not set Maven credentials as default, you must assign these credentials to the application manually before running an analysis. Otherwise, credentials will not be picked up by the application, which might result in the analysis running longer.
Click Create.
NoteMTA validates the input and creates a new credential. The Maven
settings.xmlfile must be parsed and checked for validity. If the validation fails, the following error message is displayed:not a valid key/XML file.
2.2.3. Configuring proxy credentials
To allow the migration toolkit for applications (MTA) to access external network resources through a secured gateway, configure proxy credentials in the user interface.
Procedure
- In Administration view, click Credentials.
- Click Create new.
Enter the following information:
- Name
- Description (Optional)
- In the Type list, select Proxy.
Enter the following information.
- Username
Password
NoteType-specific credential information such as keys and passphrases is either hidden or shown as [Encrypted].
Click Create.
MTA validates the input and creates a new credential.
2.3. Configuring repositories
To allow the migration toolkit for applications (MTA) access to the data required for the migration tasks, configure source and binary repositories in the user interface (UI).
You can configure the following repository types for the migration toolkit for applications (MTA) instance environment:
- Git
- Subversion
- Maven
2.3.1. Configuring Git repositories
To allow migration toolkit for applications (MTA) to access the data required for migration tasks, configure Git repositories in the user interface (UI). By configuring these repositories, you enable MTA to access your source code to identify modernization paths and required steps for your modernization efforts.
Procedure
- In Administration view, click Repositories and then click Git.
- Enable the Consume insecure Git repositories switch.
2.3.2. Configuring Subversion repositories
To allow the migration toolkit for applications (MTA) to access the data required for the migration tasks, configure Subversion repositories in the user interface (UI). By configuring these repositories, you allow MTA to access your source code to identify modernization paths and required steps for your modernization efforts.
Procedure
- In Administration view, click Repositories and then click Subversion.
- Enable the Consume insecure Subversion repositories switch.
2.3.3. Configuring a Maven repository
To give migration toolkit for applications (MTA) access to the data required for the migration tasks, configure Maven repositories in the user interface (UI). By configuring these repositories, you allow MTA to access your source code to identify modernization paths and required steps for your modernization efforts.
You can both configure a Maven repository and reduce its size in the Repositories view of the MTA UI.
If the rwx_supported configuration option of the Tackle CR is set to false, both the Local artifact repository field and the Clear repository button are disabled. Therefore, you cannot perform the following procedure.
Procedure
- In Administration view, click Repositories and then click Maven.
- Enable the Consume insecure artifact repositories switch.
Optional: To reduce the size of the Maven repository, click the Clear repository link.
NoteDepending on the size of the Maven repository, the size change might not be evident.
2.4. Configuring proxy settings
To enable the migration toolkit for applications (MTA) to access external network resources through a secured gateway, configure HTTP and HTTPS proxy settings in the user interface. Establishing these connection parameters ensures that your modernization projects can retrieve essential metadata and updates.
Procedure
- In the Administration view, click Proxy.
- Enable the HTTP proxy or HTTPS proxy switch to enable the proxy connection.
Enter the following information:
- Proxy host
- Proxy port
- Optional: Enable the HTTP proxy credentials or HTTPS proxy credentials switch to enable authentication.
- Click Insert.
2.5. Creating custom migration targets
To adjust application analysis and assessment to your needs, define custom migration targets in the migration toolkit for applications (MTA).
Architects or users with admin permissions can create and maintain custom rulesets associated with custom migration targets. Architects can upload custom rule files and assign them to various custom migration targets. The custom migration targets can then be selected in the analysis configuration wizard.
By using ready-made custom migration targets, you can avoid configuring custom rules for each analysis run. This simplifies analysis configuration and execution for non-admin users or third-party developers.
Prerequisites
-
You are logged in as a user with
adminpermissions.
Procedure
- In the Migration view, click Custom migration targets.
- Click Create new.
- Enter the name and description of the target.
Click the Provider list and choose the language provider.
IMPORTANT
Support for the Python and Node.js is a Technology Preview feature only. Technology Preview features are not supported with Red Hat production service level agreements (SLAs) and might not be functionally complete. Red Hat does not recommend using them in production. These features provide early access to upcoming product features, enabling customers to test functionality and provide feedback during the development process.
For more information about the support scope of Red Hat Technology Preview features, see Technology Preview Features Support Scope.
- In the Image section, upload an image file for the target’s icon. The file can be in either the PNG or JPEG format, up to 1 MB. If you do not upload any file, a default icon is used.
In the Custom rules section, select either Upload manually or Retrieve from a repository:
- If you selected Upload manually, upload or drag and drop the required rule files from your local drive.
If you selected Retrieve from a repository, complete the following steps:
- Choose Git or Subversion.
- Enter the Source repository, Branch, and Root path fields.
- If the repository requires credentials, enter these credentials in the Associated credentials field.
Click Create.
MTA user interface displays the new migration target on the Custom migration targets page. Non-admin users can now use the target in the Migration view.
2.6. Next steps
Chapter 3. Configuring a migration toolkit for applications instance
To adjust the migration toolkit for applications (MTA) to your needs, configure a MTA instance. By configuring the instance, you ensure MTA considers key parameters during the migration process and generates comprehensive modernization reports.
If you are a project architect, you can configure the instance’s key parameters before migration. The following parameters define applications, individuals, teams, verticals, or areas within an organization affected or participating in the migration:
- Stakeholders
- Stakeholder groups
- Job functions
- Business services
- Tag categories
- Tags
3.1. Creating a stakeholder
To identify the individuals responsible for specific applications, define stakeholders in the migration toolkit for applications (MTA) user interface (UI). Defining these roles ensures that migration assessments and questionnaires are directed to the correct subject matter experts for each application.
You can create and configure stakeholders in any order. However, the following is the most efficient order:
- Create Stakeholder groups. Note that by default, no stakeholder groups are defined.
- Create Job functions. The job function attribute classifies stakeholders and provides a list of default values that can be expanded.
- Create Stakeholders.
Procedure
Create a stakeholder group:
- In the Migration view, click Controls.
- Click Stakeholder groups.
- Click Create new.
Enter the following information:
- Name
- Description
- Member(s)
- Click Create.
Create a new job function:
- In the Migration view, click Controls.
- Click Job functions.
- Click Create new.
- In the Name text box, enter a job function title.
- Click Create.
Create a new stakeholder:
- In the Migration view, click Controls.
- Click Stakeholders.
- Click Create new.
Enter the following information:
- Name
- Job function. Note that you can create custom functions .
- Stakeholder group
- Click Create.
3.2. Creating a business service
To organize your application portfolio by function, create business services in the migration toolkit for applications (MTA) user interface (UI). By defining business services, you can specify the departments within the organization that use the application and that are affected by the migration.
Procedure
- In the Migration view, click Controls.
- Click Business services.
- Click Create new.
Enter the following information:
- Name
- Description
- Owner
- Click Create.
3.3. Creating a tag
To categorize applications based on certain parameters, create tags in the migration toolkit for applications (MTA) user interface (UI).
Migration toolkit for applications uses tags in multiple categories and provides a list of default values. However, you can create your own tag category and a new tag that is not in the default list.
You can create and configure tags in any order. However, the following is the most efficient order:
- Create tag categories.
- Create tags.
Procedure
Create a tag category:
- In the Migration view, click Controls.
- Click Tags.
- Click Create tag category.
Enter the following information:
- Name
- Rank: The order in which the tags appear on the applications.
- Color
- Click Create.
Create a tag:
- In the Migration view, click Controls.
- Click Tags.
- Click Create tag.
Enter the following information:
- Name
- Tag category
- Click Create.
Chapter 4. Creating and configuring a Jira connection
To track application migrations, create and configure a Jira issue for each migration within the migration toolkit for applications (MTA) user interface (UI).
4.1. Configuring Jira credentials
To define a Jira instance in MTA and establish a connection to that instance, create an migration toolkit for applications (MTA) credential to authenticate to the Jira instance’s API.
You can create either of the following types of Jira credentials:
- For Jira Cloud and a private Jira server or data center, use the Basic auth credential type.
- For a private Jira server or data center, use the Bearer Token credential type.
You cannot delete a credential that has already been assigned to a Jira connection instance.
Procedure
- In Administration view, click Credentials.
- Click Create new.
Enter the following information:
- Name
- Description (optional)
In the Type list, select Basic Auth (Jira) or Bearer Token (Jira):
If you selected Basic Auth (Jira), complete the following steps:
- In the Email field, enter your email.
In the Token field, depending on the specific Jira configuration, enter either your token generated on the Jira site or your Jira login password.
NoteTo obtain a Jira token, you need to log in to the Jira site.
Click Save.
The new credential appears on the Credentials page.
If you selected Bearer Token (Jira), complete the following steps:
- In the Token field, enter your token generated on the Jira site.
Click Save.
The new credential appears on the Credentials page.
- Optional: To edit the credential, click Edit.
Next steps
4.2. Creating a Jira connection
To track your application migrations, define a Jira instance in the migration toolkit for applications (MTA) user interface and establish a connection to that instance.
Note that you cannot remove a Jira connection that you used for creating issues for a migration wave if the issues exist in Jira, even after the migration wave is deleted.
Prerequisites
- You created MTA credentials. For more information, see Configuring Jira credentials.
Procedure
- In Administration view, under Issue Management, click Jira.
- Click Create new.
In the New instance window, enter the following information:
- Name of the instance
- URL of the web interface of your Jira account
- Select either the Jira Cloud or Jira Server/Data center instance type from the list
Select credentials from the list
NoteIf you selected Jira Cloud as an instance type, only Basic Auth credentials are displayed in the list.
If you selected Jira Server/Data center as an instance type, both Basic Auth and Token Bearer credentials are displayed.
Choose the type that is appropriate for the particular configuration of your Jira server or data center.
- By default, a connection cannot be established with a server with an invalid certificate. To override this restriction, enable the Enable insecure communication switch.
Click Create.
The new connection instance appears on the Jira configuration page.
Verification
On the Jira configuration page, ensure that the connection has been established and authorized:
- If the status of the Connection column displays Connected, the Jira connection is established and authorized.
- If the status of the Connection column displays Not connected, click the status to check the reason for the error.
Chapter 5. Managing applications with MTA
Configure your portfolio for modernization and migration by preparing your applications for assessment and analysis in the migration toolkit for applications (MTA) user interface (UI).
You can use the MTA UI to perform the following tasks:
- Add applications
- Assign application credentials
- Import a list of applications
- Download a CSV template for importing application lists
- Create application migration waves
- Create Jira issues for migration waves
MTA UI applications have the following attributes:
- Name (free text)
- Description (optional, free text)
- Business service (optional, chosen from a list)
- Tags (optional, chosen from a list)
- Owner (optional, chosen from a list)
- Contributors (optional, chosen from a list)
- Source code (a path entered by the user)
- Binary (a path entered by the user)
5.1. Adding a new application to the MTA UI
To populate your inventory for analysis, add applications to the migration toolkit for applications (MTA) user interface (UI).
You can add a new application to the Application Inventory for subsequent assessment and analysis.
Before creating an application, set up business services, check tags and tag categories, and create additions as needed.
Prerequisites
- You are logged in to an MTA server.
Procedure
- In the Migration view, click Application Inventory.
- Click Create new.
Under Basic information, enter the following fields:
- Name: A unique name for the new application.
- Description: A short description of the application (optional).
- Business service: A purpose of the application (optional).
- Manual tags: Software tags that characterize the application (optional, one or more).
- Owner: A registered software owner from the drop-down list (optional).
- Contributors: Contributors from the drop-down list (optional, one or more).
- Comments: Relevant comments on the application (optional).
Click Source Code and enter the following fields:
- Repository type: Git or Subversion.
Source repository: A URL of the repository where the software code is saved.
- For Subversion: this must be either the URL to the root of the repository or a fully qualified URL which (optionally) includes the branch and nested directory. When fully qualified, the Branch and Root path must be blank.
Branch: An application code branch in the repository (optional).
-
For Git: this may be any reference;
commit-hash,branchortag. -
For Subversion: this may be a fully qualified path to a branch or tag, for example,
branches/stableortags/stable. This must be blank when the Source repository URL includes the branch.
-
For Git: this may be any reference;
Root path: A root path inside the repository for the target application (optional).
- For Subversion: this must be blank when the Source Repository URL includes the root path.
NOTE: If you enter any value in either the Branch or Root path fields, the Source repository field becomes mandatory.
Optional: Click Binary and enter the following fields:
- Group: The Maven group for the application artifact.
- Artifact: The Maven artifact for the application.
- Version: A software version of the application.
-
Packaging: The packaging for the application artifact, for example,
JAR,WAR, orEAR.
NOTE: If you enter any value in any of the Binary section fields, all fields automatically become mandatory.
- Click Create. The new application appears in the list of defined applications.
Optional: Change the application settings by clicking Edit next to the application name:
- Make the required adjustments.
- Click Save.
NoteAfter editing an application, MTA recreates the language discovery and technology discovery tasks. For more information, see Displaying automated tasks.
5.2. Displaying automated tasks
To monitor the status of background processes, view automated tasks in the migration toolkit for applications (MTA) user interface (UI).
After you add a new application to the Application Inventory, you can display the automated tasks created by adding the application:
- The language discovery task identifies the programming languages in the application.
- The technology discovery task identifies specific technologies in the application.
These tasks automatically add appropriate tags to the application, reducing the effort involved in manually assigning tags to the application. After these tasks are complete, the number of tags added to the application appears under the Tags column.
You can add additional tags manually as needed. When MTA analyzes the application, it can add additional tags to the application automatically.
Procedure
- In the Application Inventory, hover over the application name to display the automated tasks.
Display the application tags:
- Click on the application’s row entry. A side pane opens.
- Click the Tags tab. The tags attached to the application are displayed.
5.3. Importing a list of applications
To streamline the process of adding and preparing multiple applications for an analysis, import an application list into the migration toolkit for applications (MTA) user interface (UI).
You can add multiple applications in bulk by using a .csv file and importing this file to the MTA UI.
Importing a list of applications does not overwrite any of the existing applications.
Procedure
Download a CSV template for importing application lists:
- In the Migration view, click Application Inventory.
-
Click the Options menu (
 ) to the right of Review.
- Click Manage imports to open the Application imports page.
-
Click the Options menu (
) to the right of Import.
- Click Download CSV template.
-
Add the list of applications to the
.csvimport file. Ensure the file contains all the required information in the required format. - In the Migration view, click Application Inventory.
-
Click the Options menu (
).
- Click Import.
- Select the desired file and click Open.
- Optional: Select Enable automatic creation of missing entities. This option is selected by default.
Verification
- Verify that the import has completed and check the number of accepted or rejected rows.
Review the imported applications by clicking the arrow to the left of the checkbox.
ImportantAccepted rows might not match the number of applications in the Application inventory list because some rows are dependencies. To verify, check the Record Type column of the CSV file for applications defined as
1and dependencies defined as2.
5.4. Assigning credentials to an application
To enable the migration toolkit for applications (MTA) to access secure source repositories, assign credentials to your applications. Associating credentials with your application ensures that the analysis engine can retrieve and process the source code and binaries.
Prerequisites
You added or imported your applications to the migration toolkit for applications (MTA) user interface (UI). For more information, see the following procedures:
Procedure
- In the Migration view, click Application inventory.
-
Click the Options menu (
) to the right of Analyze and select Manage credentials.
- Select one credential from the Source credentials list and from the Maven settings list.
- Click Save.
5.5. Setting default credentials
To avoid manually setting credentials for a large list of applications, set default credentials in the migration toolkit for applications (MTA) user interface (UI).
You might want to import a large list of applications to the MTA UI. Each of these applications requires credentials for both the language and technology discovery tasks. Instead of manually defining credentials for each application, you can set credentials that will be used by default.
You can only set Maven or source control credentials as default credentials. You can only define one default set of credentials per credential type.
Default credentials are not used for applications that already have credentials assigned to them.
Prerequisites
You added or imported an application to the MTA UI. For more information, see the following procedures:
Procedure
Optional: Identify the application that does not have credentials assigned to it:
- In the Migration view, display the list of applications by clicking Application inventory.
- Hover over the application name that does not have credentials assigned to it. The application discovery tasks fail for such applications.
- In the Administration view, click Credentials.
Set the default credentials:
-
Click the Options menu (
) to the right of the credential you want to set as default.
Click Set as default.
Alternatively, you can set default credentials directly when creating Maven or source code credentials. For more information, see the following procedures:
-
Click the Options menu (
Verification
- In the Migration view, display the list of applications by clicking Application inventory.
- Hover over the application name that does not have credentials assigned to it. Because you set default credentials, the application discovery tasks are restarted.
5.6. Creating a migration wave
To schedule and track your modernization efforts, create migration waves in the migration toolkit for applications (MTA) user interface (UI).
A migration wave is a group applications that you can migrate on a given schedule. You can track each migration by exporting a list of the wave’s applications to the Jira issue management system. This automatically creates a separate Jira issue for each application of the migration wave.
Procedure
- In the Migration view, click Migration waves.
- Click Create new. The New migration wave window opens.
Enter the following information:
- Name (optional). If you do not provide a name, the migration wave can be identified by its start and end dates.
- Potential start date. This date must be later than the current date.
- Potential end date. This date must be later than the start date.
- Stakeholders (optional)
- Stakeholder groups (optional)
- Click Create. The new migration wave appears in the list of existing migration waves.
To assign applications to the migration wave, click the Options menu (
) to the right of the migration wave and select Manage applications.
The Manage applications window opens that displays the list of applications that are not assigned to any other migration wave.
- Select the checkboxes of the applications that you want to assign to the migration wave.
Click Save.
NoteThe owner and the contributors of each application associated with the migration wave are automatically added to the migration wave’s list of stakeholders.
-
Optional: To update a migration wave, select Update from the migration wave’s Options menu (
). The Update migration wave window opens.
5.7. Creating Jira issues for a migration wave
To track modernization progress for a group of applications bundled under a migration wave, create a Jira issue in the migration toolkit for applications (MTA) user interface (UI).
You can use a migration wave to create Jira issues automatically for each application assigned to the migration wave. A separate Jira issue is created for each application associated with the migration wave. The following fields of each issue are filled in automatically:
-
Title:
Migrate <application name> - Reporter: Username of the token owner.
-
Description:
Created by Konveyor
You cannot delete an application if it is linked to a Jira ticket or is associated with a migration wave. To unlink the application from the Jira ticket, click the Unlink from Jira icon in the details view of the application or in the details view of a migration wave.
Prerequisites
- You configured Jira connection. For more information, see Creating and configuring a Jira connection.
Procedure
- In the Migration view, click Migration waves.
-
Click the Options menu (
) to the right of the migration wave for which you want to create Jira issues and select Export to Issue Manager. The Export to Issue Manager window opens.
- Select the Jira Cloud or Jira Server/Datacenter instance type.
- Select the instance, project, and issue type from the lists.
-
Click Export. The status of the migration wave on the Migration waves page changes to
Issues Created. - Optional: To see the status of each individual application of a migration wave, click the Status column.
- Optional: To see if any particular application is associated with a migration wave, open the application’s Details tab on the Application inventory page.
Chapter 6. Assessing applications with MTA
Estimate the risks and costs involved in preparing applications for containerization, including time, personnel, and other factors, by assessing applications with the migration toolkit for applications (MTA) user interface (UI). You can use the results of an assessment for discussions between stakeholders to determine whether applications are suitable for containerization.
6.1. The Assessment module features
The assessment module in the migration toolkit for applications (MTA) user interface (UI) uses customizable questionnaires to evaluate the suitability of applications for modernization. Understanding these features allows you to identify migration risks, estimate effort, and prioritize applications within your portfolio.
The migration toolkit for applications (MTA) Assessment module offers the following features for assessing and analyzing applications:
- Assessment hub
- The Assessment hub integrates with the Application inventory.
- Enhanced assessment questionnaire capabilities
In MTA 7.0, you can import and export assessment questionnaires. You can also design custom questionnaires with a downloadable template by using the YAML syntax, which includes the following features:
- Conditional questions: You can include or exclude questions based on the application or archetype if a certain tag is present on this application or archetype.
- Application auto-tagging based on answers: You can define tags to be applied to applications or archetypes if a certain answer was provided.
- Automated answers from tags in applications or archetypes.
For more information, see The custom assessment questionnaire.
You can customize and save the default questionnaire. For more information, see The default assessment questionnaire.
- Multiple assessment questionnaires
- The Assessment module supports multiple questionnaires, relevant to one or more applications.
- Archetypes
You can group applications with similar characteristics into archetypes. This allows you to assess multiple applications at once. Each archetype has a shared taxonomy of tags, stakeholders, and stakeholder groups. All applications inherit assessment and review from their assigned archetypes.
For more information, see Working with archetypes.
6.2. MTA assessment questionnaires
To determine the readiness of your portfolio for modernization, use assessment questionnaires to provide the migration toolkit for applications (MTA) user interface (UI) with the details required for the migration process. The migration toolkit for applications (MTA) uses either default or custom assessment questionnaire.
6.2.1. The default assessment questionnaire
Legacy Pathfinder is the default migration toolkit for applications (MTA) questionnaire. Pathfinder is a questionnaire-based tool that you can use to evaluate the suitability of applications for modernization in containers on an enterprise Kubernetes platform.
Through interaction with the default questionnaire and the review process, the system is enriched with application knowledge exposed through the collection of assessment reports.
You can export the default questionnaire to a YAML file:
Example 6.1. The Legacy Pathfinder YAML file
name: Legacy Pathfinder
description: ''
sections:
- order: 1
name: Application details
questions:
- order: 1
text: >-
Does the application development team understand and actively develop
the application?
explanation: >-
How much knowledge does the team have about the application's
development or usage?
answers:
- order: 2
text: >-
Maintenance mode, no SME knowledge or adequate documentation
available
risk: red
rationale: ''
mitigation: ''
- order: 0
text: unknown
risk: unknown
rationale: ''
mitigation: ''
- order: 1
text: >-
Little knowledge, no development (example: third-party or
commercial off-the-shelf application)
risk: red
rationale: ''
mitigation: ''
- order: 3
text: Maintenance mode, SME knowledge is available
risk: yellow
rationale: ''
mitigation: ''
- order: 4
text: Actively developed, SME knowledge is available
risk: green
rationale: ''
mitigation: ''
- order: 5
text: greenfield application
risk: green
rationale: ''
mitigation: ''
- order: 2
text: How is the application supported in production?
explanation: >-
Does the team have sufficient knowledge to support the application in
production?
answers:
- order: 3
text: >-
Multiple teams provide support using an established escalation
model
risk: yellow
rationale: ''
mitigation: ''
- order: 0
text: unknown
risk: unknown
rationale: ''
mitigation: ''
- order: 1
text: >-
External support provider with a ticket-driven escalation process;
no inhouse support resources
risk: red
rationale: ''
mitigation: ''
- order: 2
text: >-
Separate internal support team, separate from the development
team, with little interaction between the teams
risk: red
rationale: ''
mitigation: ''
- order: 4
text: >-
SRE (Site Reliability Engineering) approach with a knowledgeable
and experienced operations team
risk: green
rationale: ''
mitigation: ''
- order: 5
text: >-
DevOps approach with the same team building the application and
supporting it in production
risk: green
rationale: ''
mitigation: ''
- order: 3
text: >-
How much time passes from when code is committed until the application
is deployed to production?
explanation: What is the development latency?
answers:
- order: 3
text: 2-6 months
risk: yellow
rationale: ''
mitigation: ''
- order: 0
text: unknown
risk: unknown
rationale: ''
mitigation: ''
- order: 1
text: Not tracked
risk: red
rationale: ''
mitigation: ''
- order: 2
text: More than 6 months
risk: red
rationale: ''
mitigation: ''
- order: 4
text: 8-30 days
risk: green
rationale: ''
mitigation: ''
- order: 5
text: 1-7 days
risk: green
rationale: ''
mitigation: ''
- order: 6
text: Less than 1 day
risk: green
rationale: ''
mitigation: ''
- order: 4
text: How often is the application deployed to production?
explanation: Deployment frequency
answers:
- order: 3
text: Between once a month and once every 6 months
risk: yellow
rationale: ''
mitigation: ''
- order: 0
text: unknown
risk: unknown
rationale: ''
mitigation: ''
- order: 1
text: Not tracked
risk: red
rationale: ''
mitigation: ''
- order: 2
text: Less than once every 6 months
risk: red
rationale: ''
mitigation: ''
- order: 4
text: Weekly
risk: green
rationale: ''
mitigation: ''
- order: 5
text: Daily
risk: green
rationale: ''
mitigation: ''
- order: 6
text: Several times a day
risk: green
rationale: ''
mitigation: ''
- order: 5
text: >-
What is the application's mean time to recover (MTTR) from failure in
a production environment?
explanation: Average time for the application to recover from failure
answers:
- order: 5
text: Less than 1 hour
risk: green
rationale: ''
mitigation: ''
- order: 0
text: unknown
risk: unknown
rationale: ''
mitigation: ''
- order: 1
text: Not tracked
risk: red
rationale: ''
mitigation: ''
- order: 3
text: 1-7 days
risk: yellow
rationale: ''
mitigation: ''
- order: 2
text: 1 month or more
risk: red
rationale: ''
mitigation: ''
- order: 4
text: 1-24 hours
risk: green
rationale: ''
mitigation: ''
- order: 6
text: Does the application have legal and/or licensing requirements?
explanation: >-
Legal and licensing requirements must be assessed to determine their
possible impact (cost, fault reporting) on the container platform
hosting the application. Examples of legal requirements: isolated
clusters, certifications, compliance with the Payment Card Industry
Data Security Standard or the Health Insurance Portability and
Accountability Act. Examples of licensing requirements: per server,
per CPU.
answers:
- order: 1
text: Multiple legal and licensing requirements
risk: red
rationale: ''
mitigation: ''
- order: 0
text: unknown
risk: unknown
rationale: ''
mitigation: ''
- order: 2
text: 'Licensing requirements (examples: per server, per CPU)'
risk: red
rationale: ''
mitigation: ''
- order: 3
text: >-
Legal requirements (examples: cluster isolation, hardware, PCI or
HIPAA compliance)
risk: yellow
rationale: ''
mitigation: ''
- order: 4
text: None
risk: green
rationale: ''
mitigation: ''
- order: 7
text: Which model best describes the application architecture?
explanation: Describe the application architecture in simple terms.
answers:
- order: 3
text: >-
Complex monolith, strict runtime dependency startup order,
non-resilient architecture
risk: yellow
rationale: ''
mitigation: ''
- order: 0
text: unknown
risk: unknown
rationale: ''
mitigation: ''
- order: 5
text: Independently deployable components
risk: green
rationale: ''
mitigation: ''
- order: 1
text: >-
Massive monolith (high memory and CPU usage), singleton
deployment, vertical scale only
risk: yellow
rationale: ''
mitigation: ''
- order: 2
text: >-
Massive monolith (high memory and CPU usage), non-singleton
deployment, complex to scale horizontally
risk: yellow
rationale: ''
mitigation: ''
- order: 4
text: 'Resilient monolith (examples: retries, circuit breakers)'
risk: green
rationale: ''
mitigation: ''
- order: 2
name: Application dependencies
questions:
- order: 1
text: Does the application require specific hardware?
explanation: >-
OpenShift Container Platform runs only on x86, IBM Power, or IBM Z
systems
answers:
- order: 3
text: 'Requires specific computer hardware (examples: GPUs, RAM, HDDs)'
risk: yellow
rationale: ''
mitigation: ''
- order: 0
text: unknown
risk: unknown
rationale: ''
mitigation: ''
- order: 1
text: Requires CPU that is not supported by red Hat
risk: red
rationale: ''
mitigation: ''
- order: 2
text: 'Requires custom or legacy hardware (example: USB device)'
risk: red
rationale: ''
mitigation: ''
- order: 4
text: Requires CPU that is supported by red Hat
risk: green
rationale: ''
mitigation: ''
- order: 2
text: What operating system does the application require?
explanation: >-
Only Linux and certain Microsoft Windows versions are supported in
containers. Check the latest versions and requirements.
answers:
- order: 4
text: Microsoft Windows
risk: yellow
rationale: ''
mitigation: ''
- order: 0
text: unknown
risk: unknown
rationale: ''
mitigation: ''
- order: 1
text: >-
Operating system that is not compatible with OpenShift Container
Platform (examples: OS X, AIX, Unix, Solaris)
risk: red
rationale: ''
mitigation: ''
- order: 2
text: Linux with custom kernel drivers or a specific kernel version
risk: red
rationale: ''
mitigation: ''
- order: 3
text: 'Linux with custom capabilities (examples: seccomp, root access)'
risk: yellow
rationale: ''
mitigation: ''
- order: 5
text: Standard Linux distribution
risk: green
rationale: ''
mitigation: ''
- order: 3
text: >-
Does the vendor provide support for a third-party component running in
a container?
explanation: Will the vendor support a component if you run it in a container?
answers:
- order: 2
text: No vendor support for containers
risk: red
rationale: ''
mitigation: ''
- order: 0
text: unknown
risk: unknown
rationale: ''
mitigation: ''
- order: 1
text: Not recommended to run the component in a container
risk: red
rationale: ''
mitigation: ''
- order: 3
text: >-
Vendor supports containers but with limitations (examples:
functionality is restricted, component has not been tested)
risk: yellow
rationale: ''
mitigation: ''
- order: 4
text: >-
Vendor supports their application running in containers but you
must build your own images
risk: yellow
rationale: ''
mitigation: ''
- order: 5
text: Vendor fully supports containers, provides certified images
risk: green
rationale: ''
mitigation: ''
- order: 6
text: No third-party components required
risk: green
rationale: ''
mitigation: ''
- order: 4
text: Incoming/northbound dependencies
explanation: Systems or applications that call the application
answers:
- order: 3
text: >-
Many dependencies exist, can be changed because the systems are
internally managed
risk: green
rationale: ''
mitigation: ''
- order: 0
text: unknown
risk: unknown
rationale: ''
mitigation: ''
- order: 4
text: Internal dependencies only
risk: green
rationale: ''
mitigation: ''
- order: 1
text: >-
Dependencies are difficult or expensive to change because they are
legacy or third-party
risk: red
rationale: ''
mitigation: ''
- order: 2
text: >-
Many dependencies exist, can be changed but the process is
expensive and time-consuming
risk: yellow
rationale: ''
mitigation: ''
- order: 5
text: No incoming/northbound dependencies
risk: green
rationale: ''
mitigation: ''
- order: 5
text: Outgoing/southbound dependencies
explanation: Systems or applications that the application calls
answers:
- order: 3
text: Application not ready until dependencies are verified available
risk: yellow
rationale: ''
mitigation: ''
- order: 0
text: unknown
risk: unknown
rationale: ''
mitigation: ''
- order: 1
text: >-
Dependency availability only verified when application is
processing traffic
risk: red
rationale: ''
mitigation: ''
- order: 2
text: Dependencies require a complex and strict startup order
risk: yellow
rationale: ''
mitigation: ''
- order: 4
text: Limited processing available if dependencies are unavailable
risk: green
rationale: ''
mitigation: ''
- order: 5
text: No outgoing/southbound dependencies
risk: green
rationale: ''
mitigation: ''
- order: 3
name: Application architecture
questions:
- order: 1
text: >-
How resilient is the application? How well does it recover from
outages and restarts?
explanation: >-
If the application or one of its dependencies fails, how does the
application recover from failure? Is manual intervention required?
answers:
- order: 0
text: unknown
risk: unknown
rationale: ''
mitigation: ''
- order: 1
text: >-
Application cannot be restarted cleanly after failure, requires
manual intervention
risk: red
rationale: ''
mitigation: ''
- order: 2
text: >-
Application fails when a soutbound dependency is unavailable and
does not recover automatically
risk: red
rationale: ''
mitigation: ''
- order: 3
text: >-
Application functionality is limited when a dependency is
unavailable but recovers when the dependency is available
risk: yellow
rationale: ''
mitigation: ''
- order: 4
text: >-
Application employs resilient architecture patterns (examples:
circuit breakers, retry mechanisms)
risk: green
rationale: ''
mitigation: ''
- order: 5
text: >-
Application containers are randomly terminated to test resiliency;
chaos engineering principles are followed
risk: green
rationale: ''
mitigation: ''
- order: 2
text: How does the external world communicate with the application?
explanation: >-
What protocols do external clients use to communicate with the
application?
answers:
- order: 0
text: unknown
risk: unknown
rationale: ''
mitigation: ''
- order: 1
text: 'Non-TCP/IP protocols (examples: serial, IPX, AppleTalk)'
risk: red
rationale: ''
mitigation: ''
- order: 2
text: TCP/IP, with host name or IP address encapsulated in the payload
risk: red
rationale: ''
mitigation: ''
- order: 3
text: 'TCP/UDP without host addressing (example: SSH)'
risk: yellow
rationale: ''
mitigation: ''
- order: 4
text: TCP/UDP encapsulated, using TLS with SNI header
risk: green
rationale: ''
mitigation: ''
- order: 5
text: HTTP/HTTPS
risk: green
rationale: ''
mitigation: ''
- order: 3
text: How does the application manage its internal state?
explanation: >-
If the application must manage or retain an internal state, how is
this done?
answers:
- order: 0
text: unknown
risk: unknown
rationale: ''
mitigation: ''
- order: 3
text: State maintained in non-shared, non-ephemeral storage
risk: yellow
rationale: ''
mitigation: ''
- order: 1
text: Application components use shared memory within a pod
risk: yellow
rationale: ''
mitigation: ''
- order: 2
text: >-
State is managed externally by another product (examples:
Zookeeper or red Hat Data Grid)
risk: yellow
rationale: ''
mitigation: ''
- order: 4
text: Disk shared between application instances
risk: green
rationale: ''
mitigation: ''
- order: 5
text: Stateless or ephemeral container storage
risk: green
rationale: ''
mitigation: ''
- order: 4
text: How does the application handle service discovery?
explanation: How does the application discover services?
answers:
- order: 0
text: unknown
risk: unknown
rationale: ''
mitigation: ''
- order: 1
text: >-
Uses technologies that are not compatible with Kubernetes
(examples: hardcoded IP addresses, custom cluster manager)
risk: red
rationale: ''
mitigation: ''
- order: 2
text: >-
Requires an application or cluster restart to discover new service
instances
risk: red
rationale: ''
mitigation: ''
- order: 3
text: >-
Uses technologies that are compatible with Kubernetes but require
specific libraries or services (examples: HashiCorp Consul,
Netflix Eureka)
risk: yellow
rationale: ''
mitigation: ''
- order: 4
text: Uses Kubernetes DNS name resolution
risk: green
rationale: ''
mitigation: ''
- order: 5
text: Does not require service discovery
risk: green
rationale: ''
mitigation: ''
- order: 5
text: How is the application clustering managed?
explanation: >-
Does the application require clusters? If so, how is clustering
managed?
answers:
- order: 0
text: unknown
risk: unknown
rationale: ''
mitigation: ''
- order: 1
text: 'Manually configured clustering (example: static clusters)'
risk: red
rationale: ''
mitigation: ''
- order: 2
text: Managed by an external off-PaaS cluster manager
risk: red
rationale: ''
mitigation: ''
- order: 3
text: >-
Managed by an application runtime that is compatible with
Kubernetes
risk: green
rationale: ''
mitigation: ''
- order: 4
text: No cluster management required
risk: green
rationale: ''
mitigation: ''
- order: 4
name: Application observability
questions:
- order: 1
text: How does the application use logging and how are the logs accessed?
explanation: How the application logs are accessed
answers:
- order: 0
text: unknown
risk: unknown
rationale: ''
mitigation: ''
- order: 1
text: Logs are unavailable or are internal with no way to export them
risk: red
rationale: ''
mitigation: ''
- order: 2
text: >-
Logs are in a custom binary format, exposed with non-standard
protocols
risk: red
rationale: ''
mitigation: ''
- order: 3
text: Logs are exposed using syslog
risk: yellow
rationale: ''
mitigation: ''
- order: 4
text: Logs are written to a file system, sometimes as multiple files
risk: yellow
rationale: ''
mitigation: ''
- order: 5
text: 'Logs are forwarded to an external logging system (example: Splunk)'
risk: green
rationale: ''
mitigation: ''
- order: 6
text: 'Logs are configurable (example: can be sent to stdout)'
risk: green
rationale: ''
mitigation: ''
- order: 2
text: Does the application provide metrics?
explanation: >-
Are application metrics available, if necessary (example: OpenShift
Container Platform collects CPU and memory metrics)?
answers:
- order: 0
text: unknown
risk: unknown
rationale: ''
mitigation: ''
- order: 1
text: No metrics available
risk: yellow
rationale: ''
mitigation: ''
- order: 2
text: Metrics collected but not exposed externally
risk: yellow
rationale: ''
mitigation: ''
- order: 3
text: 'Metrics exposed using binary protocols (examples: SNMP, JMX)'
risk: yellow
rationale: ''
mitigation: ''
- order: 4
text: >-
Metrics exposed using a third-party solution (examples: Dynatrace,
AppDynamics)
risk: green
rationale: ''
mitigation: ''
- order: 5
text: >-
Metrics collected and exposed with built-in Prometheus endpoint
support
risk: green
rationale: ''
mitigation: ''
- order: 3
text: >-
How easy is it to determine the application's health and readiness to
handle traffic?
explanation: >-
How do we determine an application's health (liveness) and readiness
to handle traffic?
answers:
- order: 0
text: unknown
risk: unknown
rationale: ''
mitigation: ''
- order: 1
text: No health or readiness query functionality available
risk: red
rationale: ''
mitigation: ''
- order: 3
text: Basic application health requires semi-complex scripting
risk: yellow
rationale: ''
mitigation: ''
- order: 4
text: Dedicated, independent liveness and readiness endpoints
risk: green
rationale: ''
mitigation: ''
- order: 2
text: Monitored and managed by a custom watchdog process
risk: red
rationale: ''
mitigation: ''
- order: 5
text: Health is verified by probes running synthetic transactions
risk: green
rationale: ''
mitigation: ''
- order: 4
text: What best describes the application's runtime characteristics?
explanation: >-
How would the profile of an application appear during runtime
(examples: graphs showing CPU and memory usage, traffic patterns,
latency)? What are the implications for a serverless application?
answers:
- order: 0
text: unknown
risk: unknown
rationale: ''
mitigation: ''
- order: 1
text: >-
Deterministic and predictable real-time execution or control
requirements
risk: red
rationale: ''
mitigation: ''
- order: 2
text: >-
Sensitive to latency (examples: voice applications, high frequency
trading applications)
risk: yellow
rationale: ''
mitigation: ''
- order: 3
text: Constant traffic with a broad range of CPU and memory usage
risk: yellow
rationale: ''
mitigation: ''
- order: 4
text: Intermittent traffic with predictable CPU and memory usage
risk: green
rationale: ''
mitigation: ''
- order: 5
text: Constant traffic with predictable CPU and memory usage
risk: green
rationale: ''
mitigation: ''
- order: 5
text: How long does it take the application to be ready to handle traffic?
explanation: How long the application takes to boot
answers:
- order: 0
text: unknown
risk: unknown
rationale: ''
mitigation: ''
- order: 1
text: More than 5 minutes
risk: red
rationale: ''
mitigation: ''
- order: 2
text: 2-5 minutes
risk: yellow
rationale: ''
mitigation: ''
- order: 3
text: 1-2 minutes
risk: yellow
rationale: ''
mitigation: ''
- order: 4
text: 10-60 seconds
risk: green
rationale: ''
mitigation: ''
- order: 5
text: Less than 10 seconds
risk: green
rationale: ''
mitigation: ''
- order: 5
name: Application cross-cutting concerns
questions:
- order: 1
text: How is the application tested?
explanation: >-
Is the application is tested? Is it easy to test (example: automated
testing)? Is it tested in production?
answers:
- order: 0
text: unknown
risk: unknown
rationale: ''
mitigation: ''
- order: 1
text: No testing or minimal manual testing only
risk: red
rationale: ''
mitigation: ''
- order: 2
text: Minimal automated testing, focused on the user interface
risk: yellow
rationale: ''
mitigation: ''
- order: 3
text: >-
Some automated unit and regression testing, basic CI/CD pipeline
testing; modern test practices are not followed
risk: yellow
rationale: ''
mitigation: ''
- order: 4
text: >-
Highly repeatable automated testing (examples: unit, integration,
smoke tests) before deploying to production; modern test practices
are followed
risk: green
rationale: ''
mitigation: ''
- order: 5
text: >-
Chaos engineering approach, constant testing in production
(example: A/B testing + experimentation)
risk: green
rationale: ''
mitigation: ''
- order: 2
text: How is the application configured?
explanation: >-
How is the application configured? Is the configuration method
appropriate for a container? External servers are runtime
dependencies.
answers:
- order: 0
text: unknown
risk: unknown
rationale: ''
mitigation: ''
- order: 1
text: >-
Configuration files compiled during installation and configured
using a user interface
risk: red
rationale: ''
mitigation: ''
- order: 2
text: >-
Configuration files are stored externally (example: in a database)
and accessed using specific environment keys (examples: host name,
IP address)
risk: red
rationale: ''
mitigation: ''
- order: 3
text: Multiple configuration files in multiple file system locations
risk: yellow
rationale: ''
mitigation: ''
- order: 4
text: >-
Configuration files built into the application and enabled using
system properties at runtime
risk: yellow
rationale: ''
mitigation: ''
- order: 5
text: >-
Configuration retrieved from an external server (examples: Spring
Cloud Config Server, HashiCorp Consul)
risk: yellow
rationale: ''
mitigation: ''
- order: 6
text: >-
Configuration loaded from files in a single configurable location;
environment variables used
risk: green
rationale: ''
mitigation: ''
- order: 4
text: How is the application deployed?
explanation: >-
How the application is deployed and whether the deployment process is
suitable for a container platform
answers:
- order: 0
text: unknown
risk: unknown
rationale: ''
mitigation: ''
- order: 3
text: Simple automated deployment scripts
risk: yellow
rationale: ''
mitigation: ''
- order: 1
text: Manual deployment using a user interface
risk: red
rationale: ''
mitigation: ''
- order: 2
text: Manual deployment with some automation
risk: red
rationale: ''
mitigation: ''
- order: 4
text: >-
Automated deployment with manual intervention or complex promotion
through pipeline stages
risk: yellow
rationale: ''
mitigation: ''
- order: 5
text: >-
Automated deployment with a full CI/CD pipeline, minimal
intervention for promotion through pipeline stages
risk: green
rationale: ''
mitigation: ''
- order: 6
text: Fully automated (GitOps), blue-green, or canary deployment
risk: green
rationale: ''
mitigation: ''
- order: 5
text: Where is the application deployed?
explanation: Where does the application run?
answers:
- order: 0
text: unknown
risk: unknown
rationale: ''
mitigation: ''
- order: 1
text: Bare metal server
risk: green
rationale: ''
mitigation: ''
- order: 2
text: 'Virtual machine (examples: red Hat Virtualization, VMware)'
risk: green
rationale: ''
mitigation: ''
- order: 3
text: 'Private cloud (example: red Hat OpenStack Platform)'
risk: green
rationale: ''
mitigation: ''
- order: 4
text: >-
Public cloud provider (examples: Amazon Web Services, Microsoft
Azure, Google Cloud Platform)
risk: green
rationale: ''
mitigation: ''
- order: 5
text: >-
Platform as a service (examples: Heroku, Force.com, Google App
Engine)
risk: yellow
rationale: ''
mitigation: ''
- order: 7
text: Other. Specify in the comments field
risk: yellow
rationale: ''
mitigation: ''
- order: 6
text: Hybrid cloud (public and private cloud providers)
risk: green
rationale: ''
mitigation: ''
- order: 6
text: How mature is the containerization process, if any?
explanation: If the team has used containers in the past, how was it done?
answers:
- order: 0
text: unknown
risk: unknown
rationale: ''
mitigation: ''
- order: 1
text: Application runs in a container on a laptop or desktop
risk: red
rationale: ''
mitigation: ''
- order: 3
text: Some experience with containers but not yet fully defined
risk: yellow
rationale: ''
mitigation: ''
- order: 4
text: >-
Proficient with containers and container platforms (examples:
Swarm, Kubernetes)
risk: green
rationale: ''
mitigation: ''
- order: 5
text: Application containerization has not yet been attempted
risk: green
rationale: ''
mitigation: ''
- order: 3
text: How does the application acquire security keys or certificates?
explanation: >-
How does the application retrieve credentials, keys, or certificates?
External systems are runtime dependencies.
answers:
- order: 0
text: unknown
risk: unknown
rationale: ''
mitigation: ''
- order: 1
text: Hardware security modules or encryption devices
risk: red
rationale: ''
mitigation: ''
- order: 2
text: >-
Keys/certificates bound to IP addresses and generated at runtime
for each application instance
risk: red
rationale: ''
mitigation: ''
- order: 3
text: Keys/certificates compiled into the application
risk: yellow
rationale: ''
mitigation: ''
- order: 4
text: Loaded from a shared disk
risk: yellow
rationale: ''
mitigation: ''
- order: 5
text: >-
Retrieved from an external server (examples: HashiCorp Vault,
CyberArk Conjur)
risk: yellow
rationale: ''
mitigation: ''
- order: 6
text: Loaded from files
risk: green
rationale: ''
mitigation: ''
- order: 7
text: Not required
risk: green
rationale: ''
mitigation: ''
thresholds:
red: 5
yellow: 30
unknown: 5
riskMessages:
red: ''
yellow: ''
green: ''
unknown: ''
builtin: true6.2.2. The custom assessment questionnaire
To determine the readiness of your portfolio for modernization, use a custom assessment questionnaire to provide the migration toolkit for applications (MTA) user interface (UI) with the details required for the migration process.
You can import the custom assessment questionnaire by using a custom YAML syntax to define the questionnaire. The YAML syntax supports the following features:
- Conditional questions
The YAML syntax supports including or excluding questions based on tags existing on the application or archetype, for example:
If the application or archetype has the
Language/Javatag, theWhat is the main JAVA framework used in your application?question is included in the questionnaire:... questions: - order: 1 text: What is the main JAVA framework used in your application? explanation: Identify the primary JAVA framework used in your application. includeFor: - category: Language tag: Java ...If the application or archetype has the
Deployment/ServerlessandArchitecture/Monolithtag, theAre you currently using any form of container orchestration?question is excluded from the questionnaire:... questions: - order: 4 text: Are you currently using any form of container orchestration? explanation: Determine if the application utilizes container orchestration tools like Kubernetes, Docker Swarm, etc. excludeFor: - category: Deployment tag: Serverless - category: Architecture tag: Monolith ...
- Automated answers based on tags present on the assessed application or archetype
Automated answers are selected based on the tags existing on the application or archetype. For example, if an application or archetype has the
Runtime/Quarkustag, theQuarkusanswer is automatically selected, and if an application or archetype has theRuntime/Spring Boottag, theSpring Bootanswer is automatically selected:... text: What is the main technology in your application? explanation: Identify the main framework or technology used in your application. answers: - order: 1 text: Quarkus risk: green autoAnswerFor: - category: Runtime tag: Quarkus - order: 2 text: Spring Boot risk: green autoAnswerFor: - category: Runtime tag: Spring Boot ...- Automatic tagging of applications based on answers
During the assessment, tags are automatically applied to the application or archetype based on the answer if this answer is selected. Note that the tags are transitive. Therefore, the tags are removed if the assessment is discarded. Each tag is defined by the following elements:
-
category: Category of the target tag (
String). -
tag: Definition for the target tag as (
String).
For example, if the selected answer is
Quarkus, theRuntime/Quarkustag is applied to the assessed application or archetype. If the selected answer isSpring Boot, theRuntime/Spring Boottag is applied to the assessed application or archetype:... questions: - order: 1 text: What is the main technology in your application? explanation: Identify the main framework or technology used in your application. answers: - order: 1 text: Quarkus risk: green applyTags: - category: Runtime tag: Quarkus - order: 2 text: Spring Boot risk: green applyTags: - category: Runtime tag: Spring Boot ...-
category: Category of the target tag (
6.2.2.1. The YAML template for the custom questionnaire
To correctly format your assessment data for use in the migration toolkit for applications (MTA) user interface (UI), use the following YAML template for custom questionnaires.
You can download the YAML template by clicking Download YAML template on the Assessment questionnaires page.
Example 6.2. The YAML template for the custom questionnaire
name: Uploadable Cloud Readiness Questionnaire Template
description: This questionnaire is an example template for assessing cloud readiness. It serves as a guide for users to create and customize their own questionnaire templates.
required: true
sections:
  - order: 1
    name: Application Technologies
    questions:
      - order: 1
        text: What is the main technology in your application?
        explanation: Identify the main framework or technology used in your application.
        includeFor:
          - category: Language
            tag: Java
        answers:
          - order: 1
            text: Quarkus
            risk: green
            rationale: Quarkus is a modern, container-friendly framework.
            mitigation: No mitigation needed.
            applyTags:
              - category: Runtime
                tag: Quarkus
            autoAnswerFor:
              - category: Runtime
                tag: Quarkus
          - order: 2
            text: Spring Boot
            risk: green
            rationale: Spring Boot is versatile and widely used.
            mitigation: Ensure container compatibility.
            applyTags:
              - category: Runtime
                tag: Spring Boot
            autoAnswerFor:
              - category: Runtime
                tag: Spring Boot
          - order: 3
            text: Legacy Monolithic Application
            risk: red
            rationale: Legacy monoliths are challenging for cloud adaptation.
            mitigation: Consider refactoring into microservices.
      - order: 2
        text: Does your application use a microservices architecture?
        explanation: Assess if the application is built using a microservices architecture.
        answers:
          - order: 1
            text: Yes
            risk: green
            rationale: Microservices are well-suited for cloud environments.
            mitigation: Continue monitoring service dependencies.
          - order: 2
            text: No
            risk: yellow
            rationale: Non-microservices architectures may face scalability issues.
            mitigation: Assess the feasibility of transitioning to microservices.
          - order: 3
            text: Unknown
            risk: unknown
            rationale: Lack of clarity on architecture can lead to unplanned issues.
            mitigation: Conduct an architectural review.

      - order: 3
        text: Is your application's data storage cloud-optimized?
        explanation: Evaluate if the data storage solution is optimized for cloud usage.
        includeFor:
          - category: Language
            tag: Java
        answers:
          - order: 1
            text: Cloud-Native Storage Solution
            risk: green
            rationale: Cloud-native solutions offer scalability and resilience.
            mitigation: Ensure regular backups and disaster recovery plans.
          - order: 2
            text: Traditional On-Premises Storage
            risk: red
            rationale: Traditional storage might not scale well in the cloud.
            mitigation: Explore cloud-based storage solutions.
          - order: 3
            text: Hybrid Storage Approach
            risk: yellow
            rationale: Hybrid solutions may have integration complexities.
            mitigation: Evaluate and optimize cloud integration points.
thresholds:
  red: 1
  yellow: 30
  unknown: 15
riskMessages:
  red: Requires deep changes in architecture or lifecycle
  yellow: Cloud friendly but needs minor changes
  green: Cloud Native
  unknown: More information needed
Additional resources
6.2.2.2. The custom questionnaire fields
To correctly build a custom assessment questionnaire for the migration toolkit for applications (MTA) user interface (UI), view the following questionnaire fields. These definitions provide the necessary knowledge for configuring questions, answers, and weighting.
Every custom questionnaire field marked as required is mandatory. If you do not define such fields, YAML validation will fail on upload. Each subsection of the field defines a new structure or object in YAML, for example:
...
name: Testing
thresholds:
    red: 30
    yellow: 45
    unknown: 5
...
Table 6.1. The custom questionnaire fields
| Questionnaire field | Description |
|---|---|
|
|
The name of the questionnaire. This field must be unique for the entire MTA instance. |
|
|
A short description of the questionnaire. |
|
|
The definition of a threshold for each risk category of the application or archetype that is considered to be affected by that risk level. The threshold values can be the following:
The higher risk level always takes precedence. For example, if the |
|
|
Messages to be displayed in reports for each risk category. The risk_messages map is defined by the following fields:
|
|
|
A list of sections that the questionnaire must include.
|
Additional resources
6.3. Managing assessment questionnaires
To adjust the scope of your assessments, manage questionnaires in the migration toolkit for applications (MTA) user interface (UI). By importing, viewing, or deleting questionnaires, you control the criteria the MTA UI uses to evaluate the suitability of your applications for modernization.
By using the MTA UI, you can perform the following actions on assessment questionnaires:
- Display the questionnaire. You can also display the answer choices and their associated risk weight.
- Export the questionnaire to the desired location on your system.
Import the questionnaire from your system.
WarningThe name of the imported questionnaire must be unique. If the name, which is defined in the YAML syntax (
name: <name of questionnaire>), is duplicated, the import will fail with the following error message:UNIQUE constraint failed: Questionnaire.Name.Delete an assessment questionnaire.
WarningWhen you delete the questionnaire, its answers for all applications that use it in all archetypes are also deleted.
ImportantYou cannot delete the Legacy Pathfinder default questionnaire.
Procedure
Depending on your scenario, perform one of the following actions:
Display the assessment questionnaire:
- In the Administration view, select Assessment questionnaires.
-
Click the Options menu (
).
- Select View for the questionnaire you want to display.
- Optional: Click the arrow to the left of the question to display the answer choices and their risk weight.
Export the assessment questionnaire:
- In the Administration view, select Assessment questionnaires.
- Select the desired questionnaire.
-
Click the Options menu (
).
- Select Export.
- Select the location of the download.
- Click Save.
Import the assessment questionnaire:
- In the Administration view, select Assessment questionnaires.
- Click Import questionnaire.
- Click Upload.
- Navigate to the location of your questionnaire.
- Click Open.
- Import the desired questionnaire by clicking Import.
Delete the assessment questionnaire:
- In the Administration view, select Assessment questionnaires.
- Select the questionnaire you want to delete.
-
Click the Options menu (
).
- Select Delete.
- Confirm deleting by entering the Name of the questionnaire.
Additional resources
6.4. Assessing an application
Estimate the risks and costs involved in preparing applications for modernization by performing an application assessment in the migration toolkit for applications (MTA) user interface (UI).
The migration toolkit for applications (MTA) assesses applications according to a set of questions relevant to the application, such as dependencies. To assess the application, you can use the default Legacy Pathfinder MTA questionnaire or import a custom questionnaire.
You can assess only one application at a time.
During the assessment, you might encounter false positives in an application that cannot be fully resolved. This can happen because MTA cannot discover the class that is being called. Therefore, MTA cannot determine whether it is a valid match or not. You can use the following solution to resolve the issue:
- Ensure that the maven settings can get all the dependencies.
- Ensure the application can be fully compiled.
Prerequisites
- You are logged in to an MTA server.
Procedure
- In the MTA user interface, select the Migration view.
- Click Application inventory in the left menu bar. A list of the available applications appears in the main pane.
- Select the application you want to assess.
-
Click the Options menu (
) at the right end of the row and select Assess from the drop-down menu.
- From the list of available questionnaires, click Take for the desired questionnaire.
Select Stakeholders and Stakeholder groups from the lists to track who contributed to the assessment for future reference.
NoteYou can also add Stakeholder Groups or Stakeholders in the Controls pane of the Migration view. For more information, see Configuring a migration toolkit for applications instance.
- Click Next.
- Answer each Application assessment question and click Next.
- Click Save to review the assessment and proceed with the steps in Reviewing an application.
Additional resources
6.5. Reviewing an application
To determine the migration strategy and work priority for each application, review the application by using the migration toolkit for applications (MTA) user interface (UI).
You can review only one application at a time.
Procedure
- In the Migration view, click Application inventory.
- Select the application you want to review.
Review the application by performing either of the following actions:
- Click Save and Review while assessing the application. For more information, see Assessing an application.
-
Click the Options menu (
) at the right end of the row and select Review from the drop-down list.
- Click Proposed action and select the action.
- Click Effort estimate and set the level of effort required to perform the assessment with the selected questionnaire.
- In the Business criticality field, enter how critical the application is to the business.
- In the Work priority field, enter the application’s priority.
- Optional: Enter the assessment questionnaire comments in the Comments field.
Click Submit review.
The fields from Review are now populated on the Application details page.
6.6. Reviewing an assessment report
To identify migration risks and estimate the effort required for modernization, review the assessment report in the migration toolkit for applications (MTA) user interface (UI). A MTA assessment report displays an aggregated assessment of the data obtained from multiple questionnaires for multiple applications.
Procedure
- In the Migration view, click Reports. The aggregated assessment report for all applications is displayed.
Depending on your scenario, perform one of the following actions:
Display a report on the data from a particular questionnaire:
- Select the required questionnaire from a drop-down list of all questionnaires in the Current landscape pane of the report. By default, all questionnaires are selected.
- In the Identified risks pane of the report, sort the displayed list by application name, level of risk, questionnaire, questionnaire section, question, and answer.
Display a report for a specific application:
- Click the link in the Applications column in the Identified risks pane of the report. The Application inventory page opens. The applications included in the link are displayed as a list.
Click the required application. The Assessment side pane opens.
- To see the assessed risk level for the application, open the Details tab.
- To see the details of the assessment, open the Reviews tab.
Chapter 7. Tagging applications with MTA
To classify applications and instantly identify application information, for example, an application type, data center location, and technologies used within the application, attach tags to applications in the migration toolkit for applications (MTA) user interface (UI). You can also use tagging to associate archetypes to applications for automatic assessment.
You can either set an automated tagging or tag applications manually.
Not all tags can be assigned automatically. For example, an analysis can only tag the application based on its technologies. If you want to tag the application also with the location of the data center where it is deployed, you need to tag the application manually.
7.1. Creating application tags
To categorize applications according to your needs, create custom tags in the migration toolkit for applications (MTA) user interface (UI).
Procedure
- In the Migration view, click Controls.
- Click the Tags tab.
- Click Create tag.
- In the Name field in the opened dialogue, enter a unique name for the tag.
- Click the Tag category field and select the category tag to associate with the tag.
- Click Create.
Optional: Edit the created tag or tag category:
Edit the tag:
- In the list of tag categories under the Tags tab, open the list of tags in the desired category.
- Select Edit from the drop-down menu and edit the tag name in the Name field.
- Click the Tag category field and select the category tag to associate with the tag.
- Click Save.
Edit the tag category:
- Under the Tags tab, select a defined tag category and click Edit.
- Edit the tag category’s name in the Name field.
- Edit the category’s Rank value.
- Click the Color field and select a color for the tag category.
- Click Save.
7.2. Manually tagging an application
To categorize applications according to your needs, manually apply tags to applications in the migration toolkit for applications (MTA) user interface (UI).
You can manually tag an application either before or after you run an application analysis.
Procedure
- In the Migration view, click Application inventory.
-
In the row of the required application, click Edit (
 ). The Update application window opens.
- Select the desired tags from the Select a tag(s) drop-down list.
- Click Save.
7.3. Setting up automatic tagging
To classify applications based on their technology stack, use automatic tagging in the migration toolkit for applications (MTA) user interface (UI).
migration toolkit for applications (MTA) UI automatically spawns language discovery and technology discovery tasks when adding an application to the Application Inventory. When the language discovery task is running, the technology discovery and analysis tasks wait until the language discovery task is finished. These tasks automatically add tags to the application. MTA can automatically add tags to the application based on the application analysis. Automatic tagging is especially useful when dealing with large portfolios of applications.
Automatic tagging of applications based on application analysis is enabled by default.
Procedure
Before running an application analysis, ensure that the Enable automated tagging checkbox is selected in the Advanced section of the Analysis configuration wizard.
To disable automatic tagging, deselect the Enable automated tagging checkbox.
7.4. Displaying application tags
To verify the application classification, display application tags in the migration toolkit for applications (MTA) user interface (UI).
You can display the tags that were attached automatically only after you ran an application analysis.
Procedure
- In the Migration view, click Application inventory.
- Click the name of the required application. A side pane opens.
- Click the Tags tab. The tags attached to the application are displayed.
Chapter 8. Working with archetypes
To assess multiple applications at once in the migration toolkit for applications (MTA) user interface (UI), use archetypes.
An archetype is a group of applications with common characteristics. Application archetypes are defined by criteria tags and the application taxonomy. Each archetype defines how the assessment module assesses the application according to the characteristics defined in that archetype. If the tags of an application match the criteria tags of an archetype, the application is associated with the archetype.
Creation of an archetype is defined by a series of tags, stakeholders, and stakeholder groups. The tags include the following types:
Criteria tags are tags that the archetype requires to include an application as a member.
NoteAn application must have all of the archetype’s criteria tags to be a member. For example, if the application a only has tag a, but the archetype a criteria tags include tags a AND b, the application a will not be a member of the archetype a.
- Archetype tags are tags that are applied to the archetype entity.
All applications associated with the archetype inherit the assessment and review from the archetype groups to which these applications belong. This is the default setting. You can override inheritance for the application by completing an individual assessment and review.
8.1. Creating an archetype
To assess multiple applications with shared characteristics simultaneously, define an archetype in the migration toolkit for applications (MTA) user interface (UI).
When you create the archetype, an application in the inventory is automatically associated with that archetype if this application has the tags that match the criteria tags of the archetype.
Procedure
- Open the MTA web console.
- In the left menu, click Archetypes.
- Click Create new archetype.
In the form that opens, enter the following information for the new archetype:
- Name: A name of the new archetype (mandatory).
- Description: A description of the new archetype (optional).
- Criteria Tags: Tags that associate the assessed applications with the archetype (mandatory). If criteria tags are updated, the process to calculate the applications, which the archetype is associated with, is triggered again.
- Archetype Tags: Tags that the archetype assesses in the application (mandatory).
- Stakeholder(s): Specific stakeholders involved in the application development and migration (optional).
- Stakeholders Group(s): Groups of stakeholders involved in the application development and migration (optional).
- Click Create.
8.2. Assessing an archetype
To estimate the modernization effort for groups of applications with similar characteristics, assess an archetype in the migration toolkit for applications (MTA) user interface (UI).
The archetype is considered assessed when all required questionnaires have been answered.
If an application is associated with several archetypes, this application is considered assessed when all associated archetypes have been assessed.
Prerequisites
- You are logged in to an MTA server.
Procedure
- Open the MTA web console.
- Select the Migration view and click Archetype.
-
Click the Options menu (
) and select Assess from the drop-down menu.
- From the list of available questionnaires, click Take to select the desired questionnaire.
- In the Assessment menu, answer the required questions.
- Click Save.
8.3. Reviewing an archetype
To verify the scope and criteria of the assessments of applications with similar characteristics, review an archetype in the migration toolkit for applications (MTA) user interface (UI).
An archetype is considered reviewed after completing the review process once, even if multiple questionnaires are marked as required.
If an application is associated with several archetypes, this application is considered reviewed when all associated archetypes have been reviewed.
Prerequisites
- You are logged in to an MTA server.
Procedure
- Open the MTA web console.
- Select the Migration view and click Archetype.
-
Click the Options menu (
) and select Review from the drop-down menu.
- From the list of available questionnaires, click Take to select the desired assessment questionnaire.
- In the Assessment menu, answer the required questions.
- Select Save and Review. You will automatically be redirected to the Review tab.
Enter the following information:
- Proposed Action: Proposed action required to complete the migration or modernization of the archetype.
- Effort estimate: The level of effort required to perform the modernization or migration of the selected archetype.
- Business criticality: The level of criticality of the application to the business.
- Work Priority: The archetype’s priority.
- Click Submit review.
Chapter 9. Analyzing an application with analysis profiles
Use standardized configurations across components of Migration toolkit for applications such as the user interface, CLI, and the Visual Studio Code MTA plugin by using the centralized configuration management in migration toolkit for applications (MTA).
As an Architect, you can create, edit, and delete custom migration targets and configurations. For example, analysis profiles and custom rulesets in the MTA user interface. The analysis profiles contain the following details:
Analysis configuration
-
Mode of analysis (for example,
source code) - Scope of an analysis (for example, application analysis that includes all dependencies, including known Open Source libraries)
- Migration targets (default or custom)
-
Mode of analysis (for example,
Advanced configuration
- Custom rules
- Rule labels to include or exclude rules for an analysis
As a Migrator, you can use these profiles to perform an application analysis.
The MTA Hub stores the profile configurations. MTA components periodically sync with the Hub and pull the analysis profiles that contain the latest updates to the configuration.
Analysis Profile is a Technology Preview feature only. Technology Preview features are not supported with Red Hat production service level agreements (SLAs) and might not be functionally complete. Red Hat does not recommend using them in production. These features provide early access to upcoming product features, enabling customers to test functionality and provide feedback during the development process.
For more information about the support scope of Red Hat Technology Preview features, see Technology Preview Features Support Scope.
9.1. Configuring an analysis profile
As an Architect, you can configure a profile that has the configuration needed to analyze an application for a specific migration target.
Procedure
- In the Migration view, click Analysis Profiles.
- Click Create new to open the Create Analysis Profile window.
- Enter a unique name for the configuration profile in the Profile Details page.
- Click Next to go to the Configure analysis section. You can configure the analysis source, target platforms, and the scope of the dependency analysis.
Select the Analysis source from the list:
- Source code
- Source code and dependencies
- Click Next.
Select one or more target options in Set targets for the analysis:
Application server migration to either of the following platforms:
- JBoss EAP 7
- JBoss EAP 8
- Containerization
- Quarkus
- OracleJDK to OpenJDK
OpenJDK. Use this option to upgrade to either of the following JDK versions:
- OpenJDK 11
- OpenJDK 17
- OpenJDK 21
- Linux. Use this option to ensure that there are no Microsoft Windows paths hard-coded into your applications.
- Jakarta EE 9. Use this option to migrate from Java EE 8.
- Spring Boot on Red Hat Runtimes
- Open Liberty
- Camel. Use this option to migrate from Apache Camel 2 to Apache Camel 3 or from Apache Camel 3 to Apache Camel 4.
- Azure App Service
- Click Next.
Select one of the following Scope options to better focus the analysis:
- Application and internal dependencies only.
- Application and all dependencies, including known Open Source libraries.
- Select the list of packages that you want to analyze manually. If you choose this option, type the file name and click Add.
- Exclude packages. If you toggle this option on, type the name of the package and click Add.
- Click Next.
In Advanced, you can attach custom rules to the analysis by selecting the Manual or Repository mode:
- In the Manual mode, click Add Rules. Drag the relevant files or select the files from their directory and click Add.
In the Repository mode, you can add rule files from a Git or Subversion repository.
ImportantAttaching custom rules is optional if you have already attached a migration target to the analysis. If you have not attached any migration target, you must attach rules.
Optional: Set any of the following options:
- Additional target labels
- Additional source labels
- Excluded rules labels. Rules with these labels are not processed. Add or delete as needed.
- Click Next.
- In Review, verify the analysis parameters.
Click Save.
MTA saves the analysis profile on the Analysis Profiles page.
9.2. Creating custom migration targets
To adjust application analysis and assessment to your needs, define custom migration targets in the migration toolkit for applications (MTA).
Architects or users with admin permissions can create and maintain custom rulesets associated with custom migration targets. Architects can upload custom rule files and assign them to various custom migration targets. The custom migration targets can then be selected in the analysis configuration wizard.
By using ready-made custom migration targets, you can avoid configuring custom rules for each analysis run. This simplifies analysis configuration and execution for non-admin users or third-party developers.
Prerequisites
-
You are logged in as a user with
adminpermissions.
Procedure
- In the Migration view, click Custom migration targets.
- Click Create new.
- Enter the name and description of the target.
Click the Provider list and choose the language provider.
IMPORTANT
Support for the Python and Node.js is a Technology Preview feature only. Technology Preview features are not supported with Red Hat production service level agreements (SLAs) and might not be functionally complete. Red Hat does not recommend using them in production. These features provide early access to upcoming product features, enabling customers to test functionality and provide feedback during the development process.
For more information about the support scope of Red Hat Technology Preview features, see Technology Preview Features Support Scope.
- In the Image section, upload an image file for the target’s icon. The file can be in either the PNG or JPEG format, up to 1 MB. If you do not upload any file, a default icon is used.
In the Custom rules section, select either Upload manually or Retrieve from a repository:
- If you selected Upload manually, upload or drag and drop the required rule files from your local drive.
If you selected Retrieve from a repository, complete the following steps:
- Choose Git or Subversion.
- Enter the Source repository, Branch, and Root path fields.
- If the repository requires credentials, enter these credentials in the Associated credentials field.
Click Create.
MTA user interface displays the new migration target on the Custom migration targets page. Non-admin users can now use the target in the Migration view.
9.3. Using a profile to run an application analysis
As a Migrator, you can use a pre-configured analysis profile to analyze an application for a target platform.
Procedure
- In the Migration view, click Application inventory.
- Select an application that you want to analyze.
- Review the credentials assigned to the application.
- Click Analyze.
- In the Mode section, select Use analysis profile.
- Select a pre-configured profile from the list to run an analysis.
- Click Next
Enable automated tagging. Select the checkbox to automatically attach tags to the application. This checkbox is selected by default.
NoteMTA displays automatically attached tags only after you run the analysis. You can attach tags to the application manually instead of enabling automated tagging or in addition to it.
- Enable enhanced analysis details. If you enable this option, MTA uploads the logs and output of commands that you run to the Hub as the output streams. The information logged includes the analyzer raw report.
- Click Next.
- In Review, verify the analysis parameters.
Click Run.
The analysis status is
Scheduledas MTA downloads the image for the container. When MTA downloads the image, the status changes toIn-progress.NoteAnalysis takes minutes to hours to run depending on the size of the application and the capacity and resources of the cluster.
NoteMTA relies on Kubernetes scheduling capabilities to determine how many analyzer instances are created based on cluster capacity. If several applications are selected for analysis, by default, only one analyzer can be provisioned at a time. With more cluster capacity, more analysis processes can be executed in parallel.
Optional: To track the status of your active analysis task, open the Task Manager view by clicking the notifications button.
Alternatively, hover over the application name to display the pop-over window.
Verification
To check the report after the analysis is complete:
- Open the application view by clicking on the application name.
Click the Reports tab to download the results in HTML or YAML.
NoteYou can download the report if the MTA Administrator has enabled the option to download reports after running an analysis on the General configuration page in the Administration view.
Chapter 10. Analyzing applications with MTA
To identify potential risks and modernization requirements, run an analysis on your applications in the migration toolkit for applications (MTA) user interface (UI).
10.1. Configuring and running an application analysis
To determine which specific lines of code you must modify before migrating or modernizing, configure and run an application analysis in the migration toolkit for applications (MTA) user interface (UI).
You can analyze more than one application at a time against more than one transformation target in the same analysis.
If you analyze an application that requires Maven credentials to access private repositories, you must assign these credentials in the Credentials section of the Administration view. Otherwise, there might be an impact on the quality of the analysis, identified issues, or the MTA performance. For more information, see Configuring credentials.
When your system is in a disconnected environment, but you have access to a Maven proxy, the application analysis runs without failure. However, if you do not have access to the Maven proxy, Maven cannot build the application because it cannot access the required dependencies.
Note also that the analysis output in the disconnected environment usually results in fewer incidents because a dependency analysis does not run accurately without access to Maven.
After creating an application instance on the Application Inventory page, the language discovery task starts, automatically preselecting the target filter option. However, you can choose a different preferred language.
Procedure
- In the Migration view, click Application inventory.
- Select an application that you want to analyze.
- Review the credentials assigned to the application.
- Click Analyze.
Select the Analysis mode from the list:
- Binary
- Source code
- Source code and dependencies
- Upload a local binary. This option only appears if you are analyzing a single application. If you chose this option, you are prompted to Upload a local binary. Either drag a file into the area provided or click Upload and select the file to upload.
- Click Next.
Select one or more target options for the analysis:
Application server migration to either of the following platforms:
- JBoss EAP 7
- JBoss EAP 8
- Containerization
- Quarkus
- OracleJDK to OpenJDK
OpenJDK. Use this option to upgrade to either of the following JDK versions:
- OpenJDK 11
- OpenJDK 17
- OpenJDK 21
- Linux. Use this option to ensure that there are no Microsoft Windows paths hard-coded into your applications.
- Jakarta EE 9. Use this option to migrate from Java EE 8.
- Spring Boot on Red Hat Runtimes
- Open Liberty
- Camel. Use this option to migrate from Apache Camel 2 to Apache Camel 3 or from Apache Camel 3 to Apache Camel 4.
- Azure App Service
- Click Next.
Select one of the following Scope options to better focus the analysis:
- Application and internal dependencies only.
- Application and all dependencies, including known Open Source libraries.
- Select the list of packages to be analyzed manually. If you choose this option, type the file name and click Add.
- Exclude packages. If you choose this option, type the name of the package and click Add.
- Click Next.
In Advanced, you can attach additional custom rules to the analysis by selecting the Manual or Repository mode:
- In the Manual mode, click Add Rules. Drag the relevant files or select the files from their directory and click Add.
In the Repository mode, you can add rule files from a Git or Subversion repository.
ImportantAttaching custom rules is optional if you have already attached a migration target to the analysis. If you have not attached any migration target, you must attach rules.
Optional: Set any of the following options:
- Target
- Source(s)
- Excluded rules tags. Rules with these tags are not processed. Add or delete as needed.
Enable automated tagging. Select the checkbox to automatically attach tags to the application. This checkbox is selected by default.
NoteAutomatically attached tags are displayed only after you run the analysis. You can attach tags to the application manually instead of enabling automated tagging or in addition to it.
NoteAnalysis engines use standard rules for a comprehensive set of migration targets. However, if the target is not included, is a customized framework, or the application is written in a language that is not supported, for example, Ruby, you can add custom rules by skipping the target selection in the Set Target tab and uploading custom rule files in the Custom Rules tab. Only custom rule files that are uploaded manually are validated.
- Click Next.
- In Review, verify the analysis parameters.
Click Run.
The analysis status is
Scheduledas MTA downloads the image for the container to execute. When the image is downloaded, the status changes toIn-progress.NoteAnalysis takes minutes to hours to run depending on the size of the application and the capacity and resources of the cluster.
NoteMTA relies on Kubernetes scheduling capabilities to determine how many analyzer instances are created based on cluster capacity. If several applications are selected for analysis, by default, only one analyzer can be provisioned at a time. With more cluster capacity, more analysis processes can be executed in parallel.
Optional: To track the status of your active analysis task, open the Task Manager drawer by clicking the notifications button.
Alternatively, hover over the application name to display the pop-over window.
- When analysis is complete, to see its results, open the application drawer by clicking on the application name.
10.2. Reviewing analysis details
To review analysis details, such as analysis steps, access the activity log in the migration toolkit for applications (MTA) user interface (UI).
Procedure
- In the Migration view, click Application inventory.
- Click on the application row to open the application drawer.
- Click the Reports tab.
- Click View analysis details for the activity log of the analysis.
Optional: For issues and dependencies found during the analysis, click the Details tab in the application drawer and click Issues or Dependencies.
Alternatively, open the Issues or Dependencies page in the Migration view.
10.3. Accessing unmatched rules
To review the rules that did not find matching rules during an application analysis, access the list of unmatched rule IDs in the migration toolkit for applications (MTA) user interface (UI).
To access unmatched rules, you must run the analysis with enhanced logging enabled.
Procedure
- Navigate to Advanced under Application analysis.
- Select Options.
- Check Enhanced advanced analysis details.
- Run an analysis.
Access unmatched rules:
- Navigate to Reports in the side drawer.
- Click View analysis details, which opens the YAML/JSON format log view.
-
Select the
issues.yamlfile. For each ruleset, there is an unmatched section that lists the rule IDs that do not find matching rules.
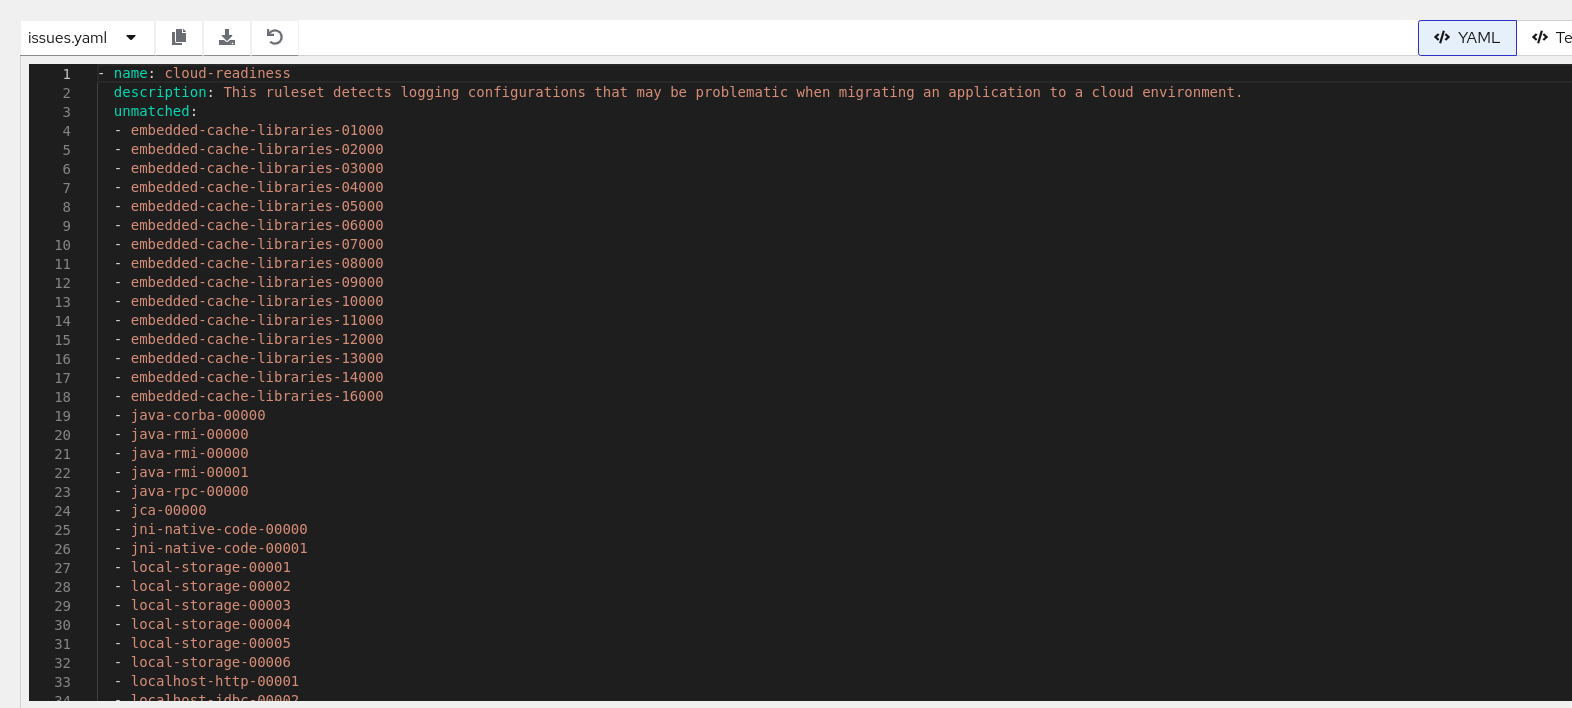
10.4. Downloading an analysis report
To identify specific migration issues and dependencies, download an analysis report from the migration toolkit for applications (MTA) user interface (UI) and review it.
The MTA analysis report contains several sections, including a listing of the technologies used by the application, the dependencies of the application, and the lines of code that must be changed to successfully migrate or modernize the application.
For more information about the contents of an MTA analysis report, see Reviewing an analysis report.
For your convenience, you can download analysis reports. Note that by default this option is disabled.
Procedure
- In Administration view, click General.
- Toggle the Allow reports to be downloaded after running an analysis. switch.
- Go to the Migration view and click Application inventory.
- Click on the application row to open the application drawer.
- Click the Reports tab.
Click either the HTML or YAML link:
-
By clicking the HTML link, you download the compressed
analysis-report-app-<application_name>.tarfile. Extracting this file creates a folder with the same name as the application. -
By clicking the YAML link, you download the uncompressed
analysis-report-app-<application_name>.yamlfile.
-
By clicking the HTML link, you download the compressed
10.5. Accessing analysis insights
To display information about the technologies used in the application and their usage in the code, access analysis insights in the migration toolkit for applications (MTA) user interface (UI).
Unlike issues, you do not need to fix analysis insights for a successful migration. They are generated by any rule that does not have a positive effort value and category assigned. They might have a message and a tag.
You can access analysis insights after you run an application analysis either from a static or dynamic report.
Procedure
Depending on your scenario, complete either of the following procedures:
Access application insights from the static report:
-
Download an analysis report in the
.tarformat. For more information, see Downloading an analysis report. -
Extract the
.tarfile. -
Open the
index.htmlfile to view the static report. - Click Insights.
-
Download an analysis report in the
Access application insights from the dynamic report:
- In the Migration view, click Insights.
- On the Insights page, filter application insights by an application name to display insights for a particular application.
Chapter 11. Managing MTA tasks by using Task Manager
To get information about the migration toolkit for applications (MTA) tasks queued for execution, access Task Manager.
Task Manager handles the following types of tasks:
- Application analysis
- Language discovery
- Technology discovery
Multi-user access restrictions are not enforced on resources. For example, an analyzer task created by a user can be canceled by any other user.
11.1. Displaying MTA tasks
To display information related to migration toolkit for applications (MTA) user interface tasks, access Task Manager.
Procedure
Depending on your scenario, display information about MTA tasks either of the following ways:
- To display active tasks, open the Task Manager drawer by clicking the notifications button.
- To display all tasks, open the Task Manager page in the Migration view.
11.2. Reviewing a task log
To find details and logs of a particular migration toolkit for applications (MTA) task, access the Task Manager page.
Procedure
- In the Migration view, click Task Manager.
-
Click the Options menu (
) for the selected task.
Click Task details.
Alternatively, click on the task status in the Status column.
11.3. Controlling the order of task execution
To preempt a migration toolkit for applications (MTA) task you have scheduled for execution, use Task Manager to control the task execution order.
You can enable Preemption on any scheduled task (not in the status of Running, Succeeded, or Failed). However, only lower-priority tasks are candidates to be preempted. When a higher-priority task is blocked by lower-priority tasks and has Preemption enabled, the low-priority tasks might be rescheduled so that the blocked higher-priority task might run. Therefore, it is only useful to enable Preemption on higher-priority tasks, for example, application analysis.
Procedure
- In the Migration view, click Task Manager.
-
Click the Options menu (
) for the selected task.
Depending on your scenario, complete one of the following steps:
- To enable Preemption for the task, select Enable preemption.
- To disable Preemption for the task with enabled Preemption, select Disable preemption.
Chapter 12. Platform awareness in MTA user interface
To import all or selective applications directly from source platform instances, use platform awareness in migration toolkit for applications (MTA) user interface (UI).
You can associate applications with source platforms in the following ways:
- Manually configure source platforms for applications that are available in MTA inventory.
- Discover (import) applications from a source platform instance. In this case, the applications are connected with the source platform when they are imported in the MTA inventory.
In MTA 8.0.0, Red Hat supports Cloud Foundry (CF) as the source platform.
After you import applications, you can retrieve platform and runtime configurations, also known as discovery. Discovery is the process of fetching configurations of the imported applications that are connected to their source platform instances. The retrieval or discovery generates a discovery manifest that contains application configurations.
You can later use the discovery manifest to generate the final set of assets required to deploy the applications in the target platform.
You can perform the following tasks in the MTA user interface:
- Create multiple source platform (CF) instances.
- Link an application created in the MTA user interface to the source platform.
- Fetch the discovery manifest. You can generate the discovery manifests per application or in bulk.
12.1. Creating a source platform in MTA user interface
To retrieve platform and runtime configurations for one or more applications, create a source platform instance in the migration toolkit for applications (MTA) user interface (UI).
An MTA administrator can configure one or more source platform instances in the MTA UI.
Prerequisites
- The MTA administrator created a Source Control credential of the source platform such as Cloud Foundry (CF) in the Administration mode.
Procedure
- In the MTA user interface, select the Administration working mode.
- Click Source platform in the left menu bar to go to the Source platforms page.
- Click Create new platform. The Create new platform dialog appears.
In the form, enter the following information:
- Name: A unique name for the source platform (CF) instance.
- Type: Select source platform from the drop down menu. For example, Cloud Foundry.
- URL: API URL of the source platform. For example, the API URL of CF platform.
- Credentials: Select the name of the Source Control credentials that you configured for the source platform.
Click Create.
The source platform instance is created. A source platform instance can be linked with one or more applications.
12.2. Discovering applications through source platform in the Administration view
After you configure a source platform, discover and import one or more applications to the MTA application inventory.
You can filter application manifests in the CF clusters by organizations and spaces, and application names.
Prerequisites
- You configured at least one source platform instance in the Administration view.
- Source platform instance must be running.
Procedure
- In the MTA user interface, select the Administration view.
- Click Source platforms in the navigation menu to go to the Source platforms page.
- Select a source platform on the Source platforms page.
-
Click the Options menu (
) of a source platform.
Click Discover applications to open the Discover applications window.
The discovery process imports all or selected applications deployed in the source platform instance to the Applications Inventory page on MTA.
- Optional: Click +Add a name to enter one application per text field and repeat the process to add more than one application. For example, app-a.
- Optional: Click +Add a space to enter one space per text field and repeat the process to add more than one space. For example, space1.
Click +Add an organization to enter at least one organization per text field and repeat the process to add more than one organization. For example, org1.
NoteFor a CF instance, the application
namesfield can contain glob expressions (globs), for example,app*.- Click Next to review the configuration.
Click Discover applications.
This action triggers an application import task.
- Close the Discover applications window.
- Optional: Hover over the source platform name to check the status of the application import task and click the application import task to view the task details in YAML format.
12.3. Discovering applications through source platform in the Migration view
After you configure a source platform, discover and import one or more applications to the MTA application inventory in the Migration view.
Prerequisites
- You configured at least one source platform instance in the Administration view.
- Source platform instance must be running.
Procedure
- In the MTA user interface, select the Migration view.
-
Click the Options menu (
) near Analyze.
Click Discover applications to open the Discover applications window.
The discovery process imports all or selected applications that are deployed in the source platform instance to the Applications Inventory page on MTA.
- Select the source platform name from the drop-down list for application discovery.
- Click Next to navigate to the Filters.
- Optional: Click +Add a name to enter one application per text field and repeat the process to add more than one application. For example, app-a.
- Optional: Click +Add a space to enter one space per text field and repeat the process to add more than one space. For example, space1.
Click +Add an organization to enter at least one organization per text field and repeat the process to add more than one organization. For example, org1.
NoteFor a CF instance, the application
namesfield can contain globs. For example,app*.- Click Next to review the configuration.
Click Discover applications.
This action triggers an application import task.
- Close the Discover applications window.
- Optional: Click the application import task to check the status of the task and to view the task details in YAML format.
12.4. Associating an application with a source platform
Associate applications that you created in migration toolkit for applications (MTA) with their source platform instances, such as Cloud Foundry (CF), by configuring the application’s coordinates.
The specific coordinates vary depending on the source platform you select. For example, the coordinates for CF instances are name and space.
Prerequisites
- You configured at least one source platform instance in the Administration mode.
Procedure
- In the MTA user interface, select the Migration mode.
-
On the Application Inventory page, click the edit icon (
 ) in an application. The Update application dialog appears.
Enter the following information in the form:
Click Source platform and enter the following fields:
- Source platform: Select a source platform instance.
Source platform coordinates: Configure the source platform coordinates in either way:
- Enter the source platform coordinates in the fields. For example, name and space for a CF instance.
Enable the source platform coordinates to enter application coordinates in JSON. For example, a CF instance coordinates can be:
{
    "name": ["example-app"],
    "space": ["example-space"]
}
- name: Type the name of the application.
- space: Configure the CF space in which the app is deployed in the source platform.
- Click Save and close the Update application dialog.
Verification
To verify that the coordinates you configured are saved in MTA:
- Click anywhere on the application row to open the application details view.
- Click the Platform tab to verify the source platform coordinates that you configured.
- Enable the JSON switch for the source platform coordinates to check the coordinates in JSON format.
12.5. Generating discovery manifests
To validate your application inventory before performing a full analysis, generate a discovery manifest in the migration toolkit for applications (MTA) user interface (UI).
To generate discovery manifest, you must retrieve the application configuration from the Cloud Foundry (CF) source platform instance. MTA generates a discovery manifest that has the application configuration, which you can later use to generate assets (deployment manifests).
You can retrieve configuration for one or more applications at a time.
Prerequisites
- The Cloud Foundry instance from which you want to retrieve configuration is running.
- You configured a source platform for the applications for which you need to retrieve configurations.
Procedure
- In the MTA user interface, select the Migration working view.
On the Application Inventory page, you can retrieve configuration for one or more applications:
Retrieve configuration for a single application:
-
Select an application and click the Options menu (
).
- Click Retrieve Configurations.
-
Select an application and click the Options menu (
Retrieve configurations for multiple applications:
-
Select the target applications or click the Select all option (
 ).
).
- Click the Options menu near Analyze at the top and click Retrieve Configurations.
-
Select the target applications or click the Select all option (
- You can review the read-only configurations in the Retrieve Configurations dialog and click Retrieve. MTA triggers a task to retrieve configuration for each application.
Verification
- Click an application row to open the application details view and click the Platform tab.
- Review the discovery manifest with the retrieved configuration and download the JSON configuration, if necessary.
Chapter 13. Generating assets for application deployment in user interface
To create different assets (manifests) required to deploy applications from Cloud Foundry (CF) instances to Red Hat OpenShift Container Platform or Kubernetes, use asset generation in MTA user interface.
To generate assets, familiarize yourself with the following entities:
- Archetypes - Archetypes contain one or more criteria tags to identify technologies such as EAP 6. An archetype helps you to classify applications based on technologies common to them. For asset generation, you can plan your migration paths by archetypes because you configure the other asset generation entities in the archetype (for example, target profiles that contain the generators).
Generators - A generator takes a templating engine, such as Helm, along with a set of templates as input configuration. Generators use the templates that are defined for a target platform and a migration path to generate deployment assets. When you run an asset generation process, the generator parses the application discovery manifest to create deployment assets.
For example, the migration path for an EAP 6 application is EAP 8 and the target platform is Kubernetes. A generator can generate the required assets to migrate the EAP 6 application to EAP 8 that is to be deployed on Kubernetes. The assets are generated by parsing the discovery manifest of the EAP 6 application.
Target profiles - A target profile represents the target platform to which you want to migrate. It contains a sequence of generators. Through target profiles, you can run more than one generator, with each generator creating assets for a specific migration path. Thus, a target profile enables you to generate assets for multiple migration path-target platform combinations at the same time for a given archetype.
For example, if you want to create assets to migrate an EAP 6 application as an OpenJDK 21 application and as an EAP 8 application in OpenShift Container Platform (target platform), you can achieve this through a target profile that has two generators, one for each migration path.
Application - The application includes the discovery manifest, tags, and the asset repository.
The configuration retrieval process generates a discovery manifest that contains the platform and runtime configurations of an application deployed in the source platform (CF) instances. During asset generation, the discovery manifest is parsed by generator templates that produce the final assets for deployment.
The application also contains tags that you must configure as criteria tags in an Archetype.
The asset repository is where you find the generated assets for deployment in the target platform.
You can reuse generators in different archetypes.
13.1. Configuring a generator
To get templates required to generate different asset manifests, configure generators that contain a repository with these templates.
Prerequisites
- You installed MTA 8.0.0 operator to access the web console.
- You are an administrator with access to the Administration mode in the MTA user interface.
- As an administrator, you configured a source control credential for the template repository (if applicable).
Procedure
In the Administration view, click Generators.
On the Generators page, you can create, edit, and delete generators.
- Click Create new generator.
Configure the following fields:
- In the Name field in the opened dialog, enter a unique name for the generator.
- Select Helm as the generator.
Click Template repository to expand the section.
- Select a Repository type from Git or Subversion.
- Optional: Enter the URL of your repository that contains the Helm templates.
- Optional: Enter the Branch of your repository.
- Optional: Enter the Root path of your repository.
- Select the credentials to access your repository if it is private.
Optional: Click Values and enter the new value for an attribute in the discovery manifest as a key-value pair.
During asset generation, the generator overrides the value of the matching attribute in the discovery manifest with the value you enter.
Optional: Click Parameters to enter parameters and their default values as a key-value pair.
Parameter fields require user input before the template can generate assets.
NoteDuring template instantiation, parameters take precedence over values, and values take precedence over the configurations present in the discovery manifest.
- Click Save. You can click anywhere on the generator row to open the details view that shows the generator configuration details, parameters, and values.
13.2. Configuring a target profile
Create and track the target profiles for a specific archetype in the migration toolkit for applications (MTA) user interface (UI).
The target profile contains one or more generators. Each generator generates assets for different migration paths.
You can configure more than one target profile for the archetype based on the target platforms to which you want to migrate applications of the specific archetype.
The generators are run in a priority order, in which manifests generated by lower priority generators do not override manifests generated by other generators.
Procedure
- In the Migration view, click Archetypes.
Click the Options menu (
) of an archetype, and select Manage target profiles.
The Target profiles for <archetype-name> appears.
- Click Create new target profile.
- In the Name field in the opened dialogue, enter a unique name for the target profile.
- Click the Tag category field and select the category tag to associate with the tag.
- Select specific generators and click the right arrow to move the generator from the Available generators list to the Chosen generators list.
- (Optional) Select an analysis profile for the application from the list. You can download this profile configuration from the MTA CLI only if you select the profile from this list.
- Click Create.
- You can click on the archetype row to open the archetype detail view where the target profiles for the archetype are listed.
13.3. Configuring an asset repository
Configure an asset repository in the migration toolkit for applications (MTA) user interface (UI) to publish generated assets. If you do not configure the asset repository, the application repository is considered the default location for publishing the generated assets.
When you configure the asset repository for an application, you can also associate the Source Control credentials of the asset repository before generating assets. If you do not configure a Source Control credential for the asset repository, MTA considers the source code repository credential as the default Source Control credential for the asset repository.
Procedure
- In the Migration view, click Applications.
-
Click the edit icon (
) to update an imported application.
In the Update application dialog, click Asset repository and configure the following details:
- Select the Asset repository type from Git or Subversion.
- Enter the asset repository URL in the Asset repository field.
- Enter the Branch of your repository.
- Enter the Root path of your repository.
- Click Save and close the Update application dialog.
-
Click Manage Credentials from the Options menu (
) of the application.
- Select the asset repository credential on the Manage Credentials dialog and close the dialog.
13.4. Generating deployment assets
To prepare your application for deployment to a container platform, generate deployment assets in the migration toolkit for applications (MTA) user interface (UI).
When you generate assets for an application, the generators render manifests for all the migration paths associated with the archetype of the application.
Prerequisites
- You generated the discovery manifest.
- You configured the application tags in an archetype.
- You configured generators and target profile in the archetype.
Procedure
- In the Migration view, click Applications.
-
Click the Options menu (
) of an application.
- Click Generate assets to open the Generate assets dialog.
- Select a target profile and click Next.
- Click the toggle button to open the JSON view where you can enter the parameter values.
- Click Next to review the configurations to generate assets.
Click Generate assets.
You can view the generated assets in the asset repository that you configured.
Appendix A. How to contribute to the MTA project
You can help the migration toolkit for applications (MTA) to cover most application builds and server configurations, including yours.
You can help with any of the following items:
- Send an email to jboss-migration-feedback@redhat.com and let us know what MTA migration rules must cover.
- Provide example applications to test migration rules.
Identify application components and problem areas that might be difficult to migrate:
- Write a short description of the problem migration areas.
- Write a brief overview describing how to solve the problem in migration areas.
- Try migration toolkit for applications on your application. Report any issues you meet. MTA uses Jira as its issue tracking system. If you encounter an issue when using MTA, submit a Jira issue.
Contribute to the migration toolkit for applications rules repository:
- Write a migration toolkit for applications rule to identify or automate a migration process.
Create a test for the new rule.
For more information, see Rule Development Guide.
Contribute to the project source code:
- Create a core rule.
- Improve MTA performance or efficiency.
Any level of involvement is greatly appreciated!
Additional resources